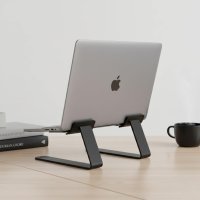
In a world where our living and working spaces are constantly merging, every square inch of desk real estate counts. If you’re tired of a cluttered desk, poor posture from hunching over your screen, or simply want a more flexible workstation, the wall mounted laptop stand might be the elegant solution you’ve been searching for. It’s a game-changer for creating a minimalist, ergonomic, and highly efficient setup, whether in a home office, a cozy apartment, or even a workshop.
As the lead content creator at Wweaw, with over a decade of hands-on experience in ergonomic design, I’ve seen how the right equipment can transform a workspace. This guide will walk you through everything you need to know about wall mounted laptop stands, from their core benefits to choosing and installing the perfect one for your needs.
Why Choose a Wall Mounted Laptop Stand?
Before we dive into the specifics, let’s explore why this solution is gaining so much popularity. A wall mounted laptop stand isn’t just about lifting your laptop off the desk; it’s about fundamentally rethinking your workspace for the better.
- Ultimate Space Saver: This is the most significant advantage. By elevating your laptop, you reclaim your entire desk surface for writing, sketching, or other tasks. In small apartments or dorm rooms, it can even eliminate the need for a traditional desk altogether.
- Ergonomic Excellence: Staring down at a laptop screen is a primary cause of neck and shoulder pain. A wall mount allows you to position your screen at the perfect eye level, promoting a healthy posture whether you’re sitting or standing.
- Create an Instant Standing Desk: Easily convert any area into a standing workstation. Mounting a stand at the appropriate height gives you the flexibility to stand and work, which has been shown to improve energy levels and reduce the health risks associated with a sedentary lifestyle.
- A Sleek, Minimalist Aesthetic: A “floating” laptop setup looks clean, modern, and organized. It eliminates the visual clutter of a traditional stand and helps create a more focused and inspiring work environment.
The Main Types of Wall Mounted Laptop Stands
Not all wall mounts are created equal. They generally fall into three main categories, each suited for different needs and spaces.
1. The Fixed Shelf Stand
This is the simplest design, essentially a sturdy shelf or platform mounted directly to the wall. It’s a robust and straightforward solution, perfect if you have a designated spot and don’t require frequent adjustments.
- Best for: Dedicated workstations, areas where the laptop’s position is constant.
- Pros: Very stable, often higher weight capacity, easy to install.
- Cons: Lacks adjustability in height or angle.
2. The Folding Wall Mount
|
Our Picks for the Best Laptop Stand in 2026
As an Amazon Associate I earn from qualifying purchases.
|
||
| Num | Product | Action |
|---|---|---|
| 1 | Adjustable Laptop Stand for Desk, Metal Foldable Laptop Riser Holder, Portable Desktop Book Stands, Ventilated Cooling Computer Notebook Stand Compatible with 10-15.6” Laptops |

|
| 2 | tounee Telescopic Laptop Stand for Desk with 360° Swivel Base, Sit to Stand, Height Adjustable, Portable Riser Holder for Good Posture, Compatible with MacBook Pro, All Laptops 10-17\"-Gray |
|
| 3 | BESIGN LS03 Aluminum Laptop Stand, Ergonomic Detachable Computer Stand, Riser Holder Notebook Stand Compatible with Air, Pro, Dell, HP, Lenovo More 10-15.6\" Laptops, Black |
|
| 4 | Laptop Stand for Desk, Adjustable Laptop Riser ABS+Silicone Foldable Portable Notebook Holder, Ventilated Cooling Notebook Mount Computer Stand for 10-15.6” Laptops,Tablets-Black |
|
| 5 | BESIGN LS03 Aluminum Laptop Stand, Ergonomic Detachable Computer Stand, Notebook Riser Compatible with Air, Pro, Dell, HP, Lenovo More 10-15.6\" Laptops, Silver |
|
| 6 | OMOTON 360° Rotating Laptop Stand Riser for Desk, Ergonomic Foldable Computer Stand Adjustable Height Angles for Collaborative Work, Easy Storage Fit Macbooks,All Laptops up to 16 inches, Silver |
|
| 7 | acer Laptop Stand for Desk - with 360 Swivel Base, Rotating Laptop Riser for Desk, Adjustable Computer Stand for Laptops, Ergonomic Riser Holder Foldable, Portable MacBook Pro Air (10-16\") - Silver |
|
| 8 | Lamicall Adjustable Laptop Stand, Portable Laptop Riser, Aluminum Laptop Stand for Desk Foldable, Ergonomic Computer Notebook Stand Holder for MacBook Air Pro, Dell XPS, HP (10-17.3\'\') - Silver |
|
| 9 | Amazon Basics Sturdy and Portable Ergonomic Laptop Stand for Desk, Height Adjustable Riser with Ventilated Cooling, Foldable, Fits all Laptops up to 17.3 Inch, Silver, 10 x 8.7 x 6 in |
|
| 10 | Adjustable Laptop Stand, Computer Stand with 360 Rotating Base, Ergonomic Laptop Riser Mount for Desk Foldable Protable Computer Desk Fits with MacBook Pro Air (10-16\") - Black |
|
Ideal for extremely tight spaces, a folding mount features a platform that can be collapsed flat against the wall when not in use. It’s the epitome of space-saving functionality.
- Best for: Hallways, small bedrooms, or multi-purpose rooms.
- Pros: Disappears when you don’t need it, incredibly space-efficient.
- Cons: May offer limited ergonomic adjustments compared to arm mounts.
3. The Articulating Arm Mount
This is the most versatile and ergonomic option. An articulating arm mount gives you complete freedom to pull the laptop closer, push it away, tilt the screen, swivel it side-to-side, and adjust its height on the fly.
- Best for: Dynamic workstations, users who switch between sitting and standing, or those needing maximum flexibility.
- Pros: Superior ergonomic adjustment, versatile positioning.
- Cons: Can be more complex to install, may have a larger wall footprint.
How to Choose the Perfect Wall Mounted Laptop Stand
Selecting the right stand involves more than just picking a style. Here are the crucial factors to consider to ensure a perfect fit for your device and your space.
Know Your Laptop’s Weight and Size
First and foremost, check the weight capacity of the wall mount. Always choose a mount that can comfortably handle your laptop’s weight with a bit of a margin for safety. Also, ensure the platform or tray size is compatible with your laptop’s dimensions, allowing for proper ventilation.
Understand Your Wall Type
The wall you plan to mount the stand on is critical for a secure installation.
- Drywall: This is the most common residential wall type. You must locate a wall stud to screw into. Mounting directly into drywall with anchors alone is not recommended for the dynamic weight of a laptop and your hands.
- Brick or Concrete: These surfaces provide a very secure anchor point. You will need a hammer drill and the appropriate masonry anchors, which are often included with the mount.
- Plaster: Older homes may have plaster walls, which can be brittle. It’s crucial to drill carefully and use appropriate anchors to avoid cracking.
“A common mistake I see is people underestimating the importance of a secure mounting point. Always anchor your wall mounted laptop stand into a stud on drywall. The stability of your expensive device depends on it.” – Dr. Alistair Finch, Ergonomics Consultant.
Prioritize Adjustability and Ergonomics
Think about how you work. Do you need to adjust the screen angle to avoid glare? Do you want to switch between sitting and standing? If so, an articulating arm with a wide range of motion for height, tilt, and swivel is your best bet. For proper ergonomics, the top of your screen should be at or slightly below eye level.
Don’t Forget Cable Management
A floating laptop looks best without a messy tangle of wires hanging down. Many articulating arm mounts come with integrated cable management clips or channels to route your power and accessory cords neatly along the arm for a clean, professional look.
A Quick Guide to Installation
While you should always follow the manufacturer’s instructions precisely, here is a general overview of the installation process:
- Gather Your Tools: You’ll typically need a drill, the correct drill bits, a stud finder (for drywall), a level, a pencil, and a screwdriver or socket wrench.
- Pick Your Spot: Decide on the ideal location and height for your laptop. Use a pencil to mark the spot.
- Locate the Stud: If you have drywall, use a stud finder to locate the wooden stud behind the wall. This is a non-negotiable step for a secure mount.
- Mark and Drill Pilot Holes: Hold the wall plate in position, use a level to ensure it’s straight, and mark where your screw holes will go. Drill pilot holes that are slightly smaller than the mounting screws.
- Attach the Mount to the Wall: Securely screw the wall plate into the wall (or stud). Give it a firm tug to ensure it’s solid.
- Assemble the Rest of the Stand: Attach the arm and laptop tray according to the instructions.
- Test and Adjust: Place your laptop on the stand and make any necessary tension adjustments to the arm so it moves smoothly and holds its position. Route your cables.
Frequently Asked Questions (FAQ)
Q: Is a wall mounted laptop stand stable enough for typing?
A: Absolutely. When installed correctly into a wall stud or solid masonry, a high-quality wall mount is extremely stable and designed to handle the vibrations from typing without any issue.
Q: Can a wall mount damage my wall?
A: Installation requires drilling holes, which will leave a mark if you decide to remove it. However, these small holes are easily patched and painted over. The key to preventing damage is proper installation; a poorly installed mount could fail and harm the wall.
Q: Will a wall mounted stand work with any laptop?
A: Most stands are universally compatible, but you must check the weight and size specifications. Ensure the mount’s tray is large enough for your laptop and can support its weight.
Q: Can I use a wall mount for a tablet or a monitor?
A: Many laptop wall mounts can also hold tablets. For a monitor, you should look for a VESA-compatible wall mount specifically designed for monitors, as they use a different attachment system.
Q: How high should I mount my laptop stand?
A: For optimal ergonomics, the top of your screen should be at or just below your eye level when you are in your primary working position (sitting or standing). It’s a good idea to have someone help you hold the laptop in place to find the perfect height before you start drilling.
Reclaim Your Space and Transform Your Workflow
A wall mounted laptop stand is more than just an accessory; it’s a strategic investment in your productivity, comfort, and the overall functionality of your space. By lifting your workspace from the horizontal to the vertical plane, you unlock new possibilities for organization and ergonomic health. Whether you’re aiming for a minimalist setup, a flexible standing desk, or simply a clutter-free environment, this versatile tool delivers on all fronts. Take the time to choose the right model and install it correctly, and you’ll wonder how you ever worked without one.
Get our weekly buyer guide
Practical specs, not advice. Unsubscribe anytime.